When you use a VPS with Windows server edition installed you are provided by default with one user account and one adminsitrator account.
This is because Windows server is licensed to one user, but requires an administrator account to setup and access that user. You can add or change any users on the VPS so you can have two seperate log-in areas to the VPS.
These areas are not shared and will be treated as two seperate Windows sesssions when you log into them. Therefore will share resources across your platform so any configuration you use will effectively half if you run two sessions. You may want to consider a higher specification VPS to ensure that each session has enough power to run independantly.
To set up a second username on your VPS, please following these steps: –
Click on the Windows icon in the bottom left of the VPS then click on ‘Windows Administrative tools’
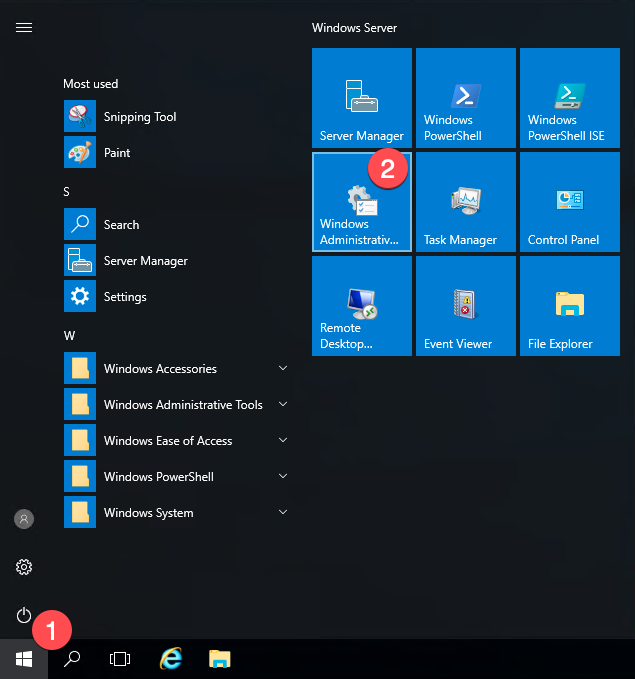
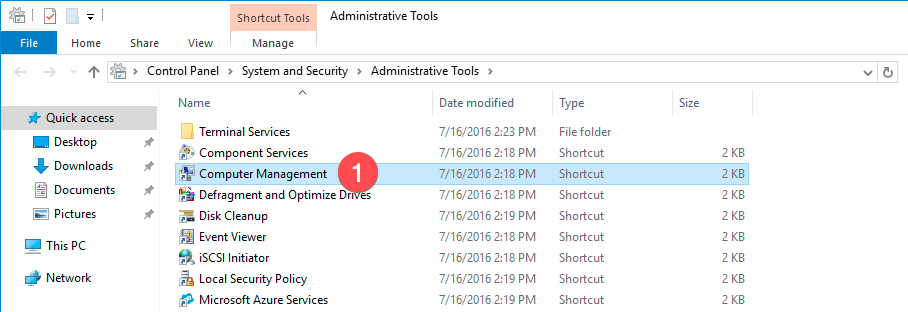
This will bring up the ‘Administrative tools’ section. When in that area click on the ‘Computer Management’ option
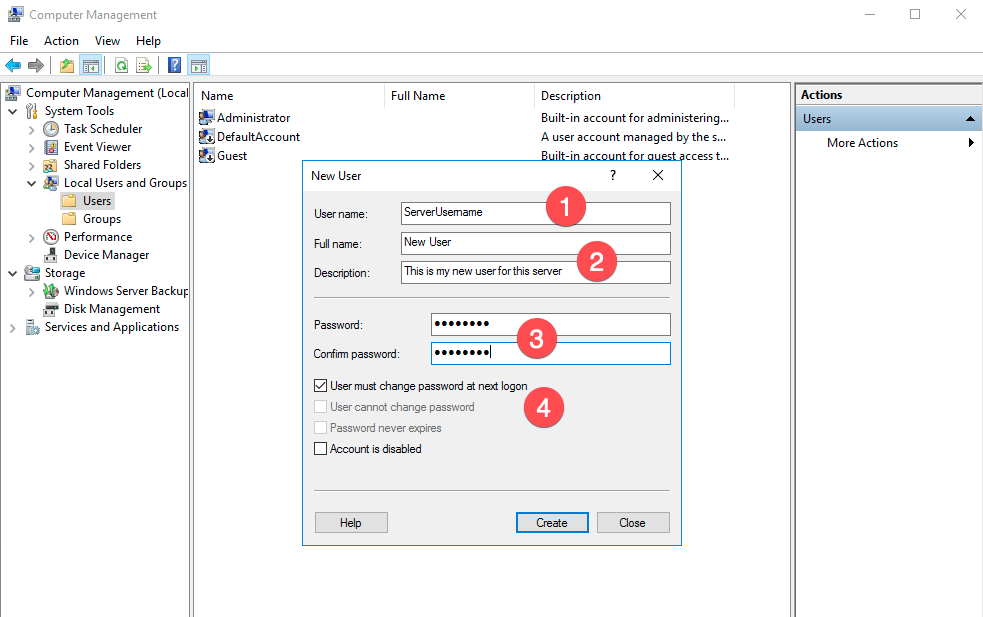
When that section appears, double click on the ‘Local Users and Groups’ section. Then right click underneath the existing users you see and this will give you the option to create a new user: –
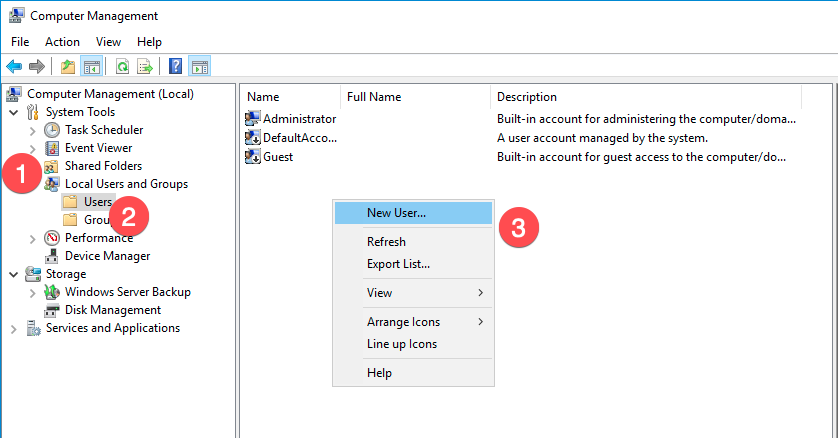
Enter the new user details you require as indicated on box that appears. Be careful to select or deselect the ‘User must change password’ option to ensure you have correctly set up the new user. This is useful if you are giving access to somebody else who requires a secure connection and wants to set their own password.
Once the new user account is created you need to assign ‘rights’ to that user.
These can come in many forms, which we will not explain here. But typically you would assign certain rights to each user depending on how they wanted to access the server. So in this case we want to assing rights for the new user to have access to the server via the remote desktop. You may also wish to make this new user an administrator.
To assign rights for this new user to access the server via remote desktop, follow these steps: –
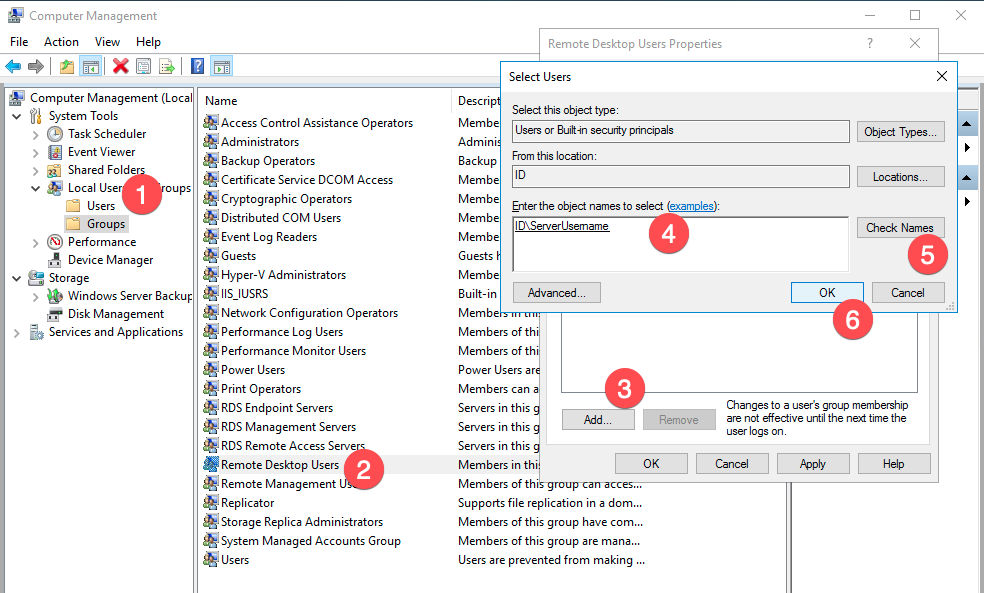
- Click on the ‘Groups’ folder
- Select ‘Remote Desktop Users’
- Click on the ‘Add’ button
- Type the username name in the empty text box
- Check the username is correct
- Click on OK to complete this action
You should now have succesfully set up a new user and given them access to the server via Remote Desktop.