
Automating your activity with Bet Angel
Bet Angel automation is quite simple. When you first fire it up though, you may not thing this but lets look at why a complicated looking interface is easy to understand once you look at each section in turn rather than as a whole.
Rules files
Firstly, let’s have an overview of the terminology. In Bet Angel we call the automation instructions ‘Rules’. These ‘Rules’ simply tell Bet Angel what to do and when to do it. You can add many ‘Rules’ to a single ‘Rules file’ and then attach that file to a market. If you wish to apply more automation to a market you can add more ‘Rules’ within your ‘Rules file’ but you can only apply a single ‘Rules file’ to a market.
For example, I might want to instruct Bet Angel to place a BACK bet. So I create a ‘Rule’ to do this. Then I might want to green up. So I add another ‘Rule’ to the same ‘Rules file’. I can even put in contradictory ‘Rules’ into the same ‘Rules file’ – one that places BACK bets and another that places LAY bets on different market selections or even the same one.
Got it? Great.
The rules editor
Let’s have a look at the automation rules editor. If you don’t know how to get this far I recommend you read my earlier post here.
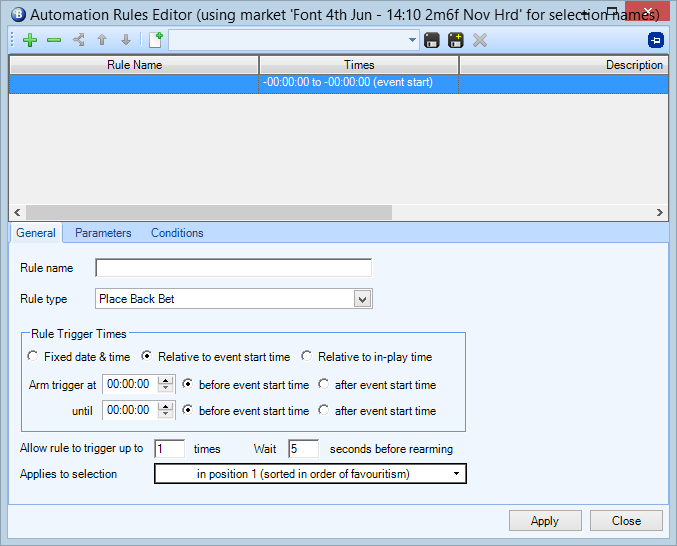
This is the automation rules editor and as you can see I have started t0 create the first rule in this rules file. I am going to place a BACK bet.
So in the ‘Rule type’ drop down I select ‘Place Back Bet’. I’m not sure how we can make that any simpler.
Of course we can’t just place a BACK bet without specifying more information. Such as when & how much.
The ‘When’ part can be seen in the section below where we just specified the rule type:
The rule is active during the time specified here
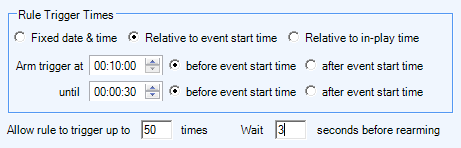
Here you can see I have asked for this rule to be active 10 minutes before the start of an event until 30 seconds before the start of an event. But there may be times when I want the rule to be active at a fixed time; say 3:30pm on a Saturday afternoon or perhaps I want the rule to be active during the time a market is in-play. So these options are provided also. It may make the section look a little more complicated but it isn’t. It’s about as simple as it can be made.
I have also asked Bet Angel to allow this rule to fire up to 50 times with a 3 second gap between the last bet being fired and the rule becoming active again.
The only simpler way of submitting a back bet is to use the one click screen or ladder interface. But then they are not automated.
We now need to specify at what price we are going to submit the bet at. The simplest way would be to just have one option of submitting the bet at the current back price. But we imagined professional traders would likely need a little more flexibility when it came to selecting a price. So we made the following options:
- Fixed price (e.g. 3.6)
- Best market price (current price)
- 2nd best market price
- 3rd best market price
- Custom ticks above best market price
- Custom ticks below best market price
- Custom ticks above best reverse market price
- Custom ticks below best reverse market price
Now, ‘Custom ticks below best reverse market price’ might seem a bit of a mouthful when trying to decide what price to place your automated bet on. But if you reverse the book often (as most professional traders do as far as I’m aware) then you may wish to use the reverse prices as your reference point.
You would choose above best price when BACKING as this is saying you wish to request a better price than that offered. And choose below best price when LAYING for the same reason.
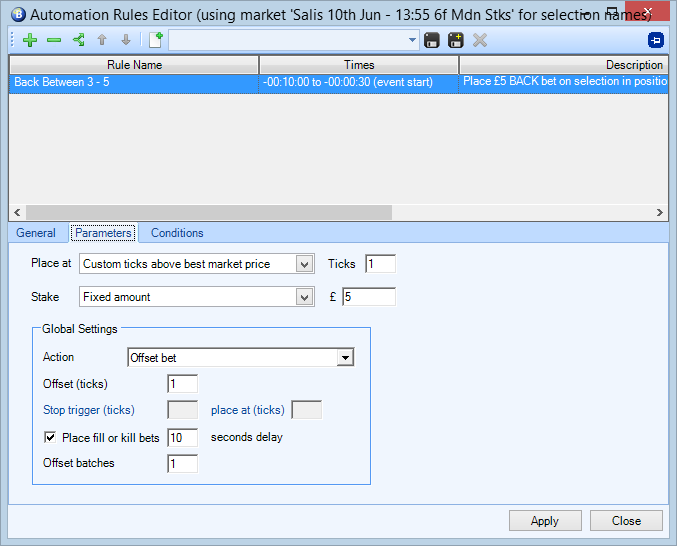
To start off I recommend you choose ‘Custom ticks above best market price’ and choose 1 tick. Select a stake, for example, £5.
Automation also allows you to incorporate Global Settings. Don’t be fooled by the name. The term ‘Global settings’ does not mean that the settings are global. However, it allows you to apply offsetting, fill/kill and stops to your bet if you so wish.
The simplest is Offset bet. I always use fill/kill so set this to a 10 second delay.
Set to a single offset batch.
Adding conditions to basic automation
We will now need to set our conditions. Off the top of my head let’s say we only want to trigger this bet if the price is in the range 3.0 – 6.0.
Simply choose the ‘Fixed Odds condition’ from the drop down list.
Add one condition for Back price is greater than 3 and another one for Back price is less than 6.

Now all you need to do is attach this automation file to your markets and leave it to run. You might want to add a greening rule to the rules file.
What could be simpler? Just because there is a lot of depth to automation does not mean it is complicated. It just means you need to learn how to use it and become familiar with all the different rules types, parameter settings and conditions. You will probably only use a couple of them in your automation files anyway.
Note – always use Practice mode when testing out your automation files to ensure they work as expected although it’s worth remember that practice mode is not suitable for long term testing of your strategy.
See the attached video to see this automation file being created.
Download the file and import into Bet Angel Guardian Automation (right click and choose ‘Save as’ or whatever option your browser gives you to save the file) – Click Here
![]()
Category: Using Bet Angel


