If you are using an Android tablet and Bet Angel via a VPS, a Virtual private server, then you will need to go through the following steps to connect to your VPS.
Connecting to a remote server
A virtual private server, or a remote server, is a fancy name for a PC which, rather than being on your desktop, is located in a datacentre. The server acts and behaves, in general, like a normal Windows PC and can be used as such.
You can install & run any software on the remote server, just like a local PC. You can also browse the internet and perform other functions on the remote server. Therefore, once connected, you can use it just like a normal PC.
There are some differences in terms of the way a remote server is managed, these are different to a normal PC. So it is recommended that, if you have never managed a remote server before, you leave the settings as you see them when you first use the server.
You need some RDP client software
To connect to a remote server, you need some client software to RDP to the server. This sounds complicated but is very simple, it’s just that the technology industry likes to use fancy names to describe simple processes.
To cut through the gobbledygook, you are the using the client software. You will connect to the server. You do this via some RDP software. ‘RDP’ stands for remote desktop protocol and this is the way you receive information from the server.
The way this works is rather clever. Rather than transferring large amounts of data between you are the server, the RDP client just uses image changes it can see on the server, compresses them and sends them to your software for you to see what is happening on the server. This means it looks and feels like you are using the server, but in fact it’s all taking place remotely. When you move your mouse, it moves on the server and so on.
Downloading some RDP software
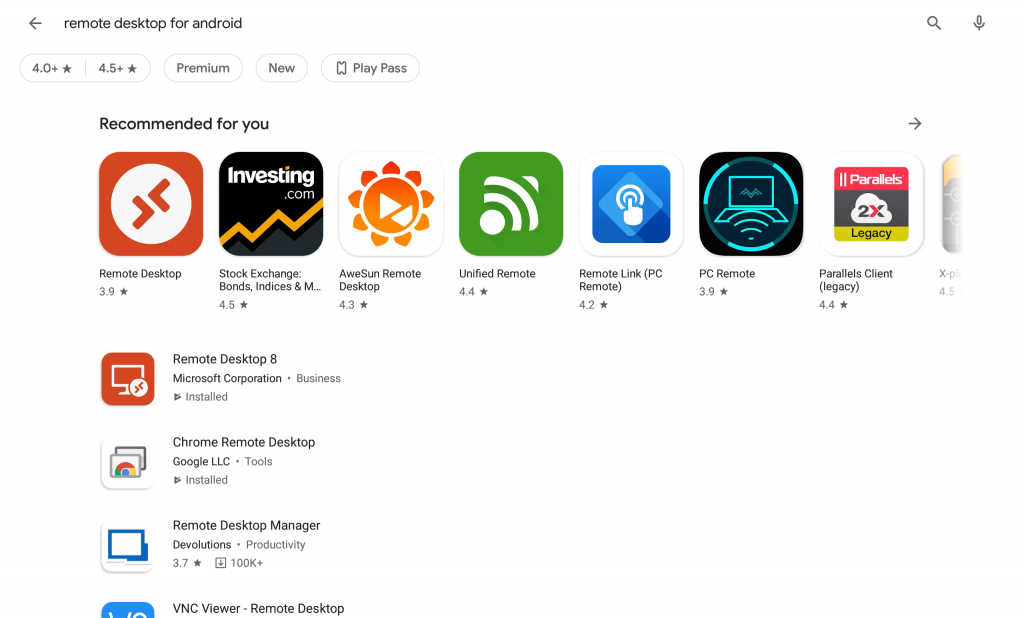
There are lots of choices of remote desktop software for Android devices. If you go to the Google play store and search for ‘remote desktop’ you will see plenty. We recommend starting with Microsoft Remote Desktop as it’s easy to use, and free! We searched for “Remote Desktop” to bring up this list.
Download and install the software and following the remaining steps to connect to your server.
Connecting to your VPS
Start up your Microsoft remote desktop software then click on the ‘+’ sign in the top right hand corner and add a ‘Desktop’ session.
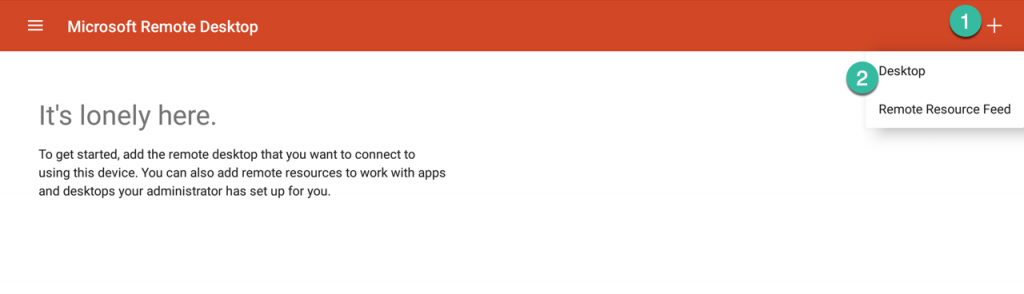
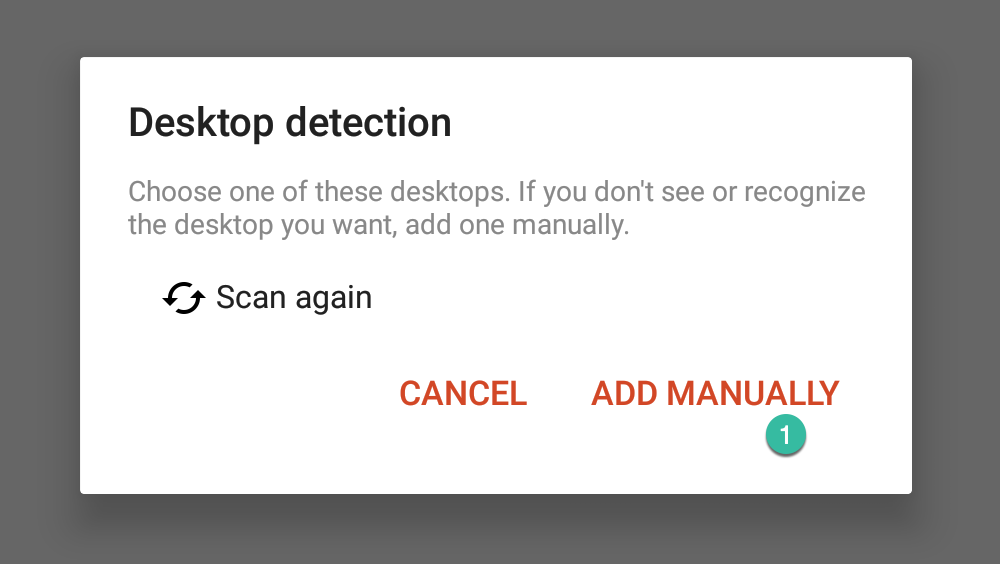
You may find that the software automatically tries to connect to a desktop nearby. If it does this it will displaying the ‘Desktop detection’ message. You will need to ignore this and any desktop sessions it finds locally. Just click on ‘Add manually’ to set up your VPS.
Adding your Server details
When you click on ‘Add manually’ you will be presented with a window where you can enter your server details. You will need to enter the details we have provided to you via email when you bought the VPS service.
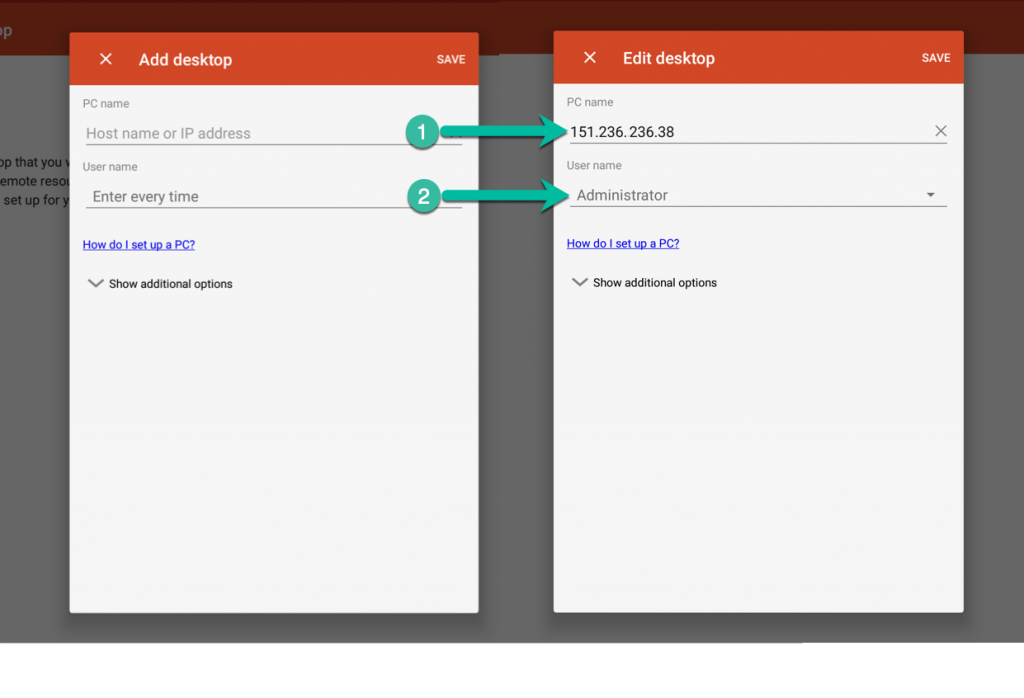
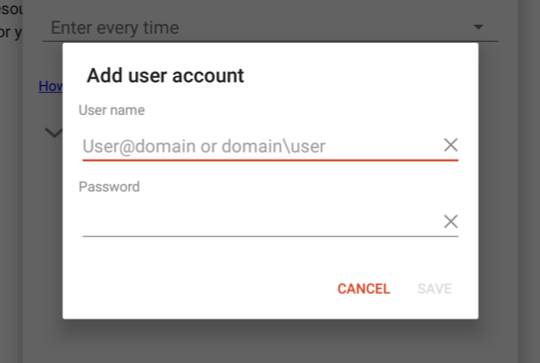
You may be asked to add a user account. If you are asked to do this then this would add this as required using the information we have sent to you in a set up email. Normally your initial username would be ‘Administrator’ and the initial password will also be in your set up instructions which are sent to you.
You are nearly done!
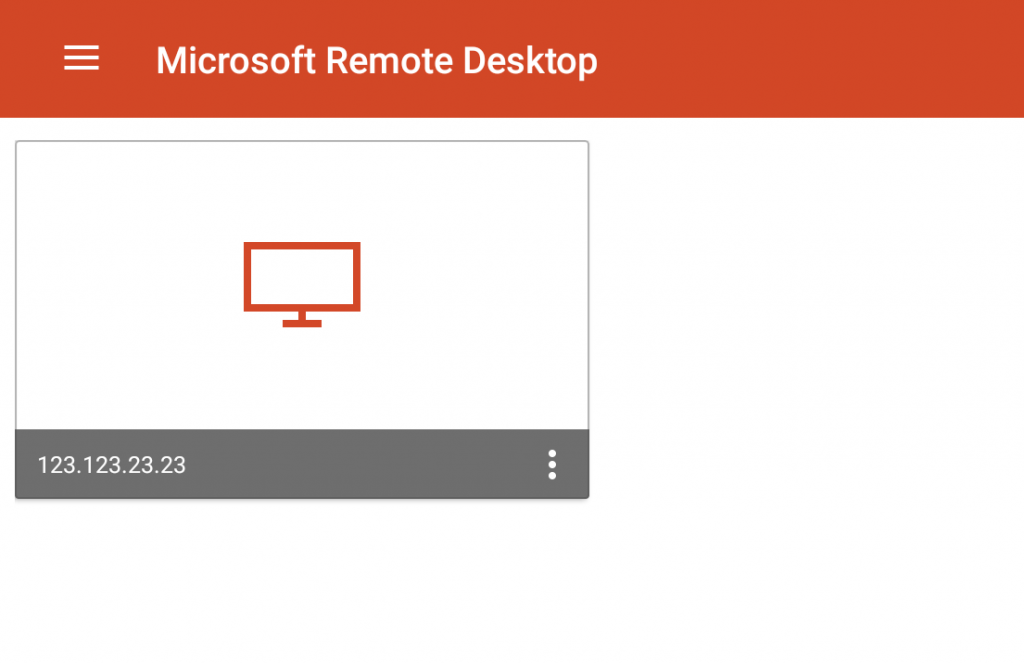
If you have completed the above steps correctly then you will see a new window appear on the Microsoft remote desktop panel. You can enter more than one desktop if you wish and can use this main panel on the software to control more than one server.
Double clicking the icon of your server will show a screen that confirms that it is connecting to your server. After a few moments, you server desktop screen will appear and you can start using it.