It can be recommended to change windows remote desktop default port for added security or to change the entry port on your server to avoid a routing issue. You can change the default port with a few easy steps. First, you’ll define this port in a firewall rule, then you will change the RDP port.
You can choose to use any port that is not in use or reserved, there is a wiki list of all the ports that are officially or unofficially used. So it’s best to choose something that is not on that list. If you wish, contact our support team for a recommendation.
This process is considered an ‘advanced’ process as you need to modify the registry. If you fail to perform both actions correctly you will be locked out of your VPS and the only option is to completely reimage the server.
Therefore, we suggest you back up all important information before you attempt this. If you take care however you shouldn’t have a problem updating your port number.
Here are step by step instructions on how to modify your RDP port.
Step 1 – Change the Firewall to allow your new port
First you need to find the firewall. The best way to do this is to click on Windows icon and type in ‘Firewall’. You will see ‘Windows Firewall with Advanced Security’ appear.
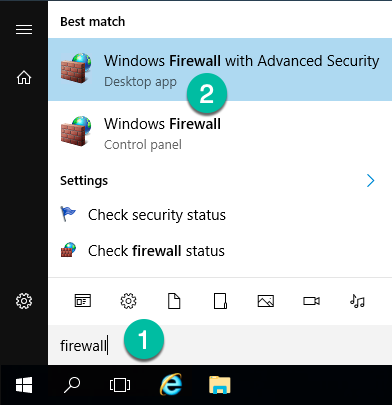
- Open Firewall (Windows Defender Firewall with Advanced Security)
- If not open already, select and click on ‘advanced settings’
- From the left sidebar click on
Inbound Rules - From the right sidebar click on
New Rule - Select
Portand clickNext - Select
TCPand type the port number inSpecific local portand clickNextuntil you reach the step where you asked to enter a rule name, give the rule a name and ClickFinish. (Repeat but select UDP if you want to set up UDP as well)
Step 2 – Change RDP TCP port on Windows Server
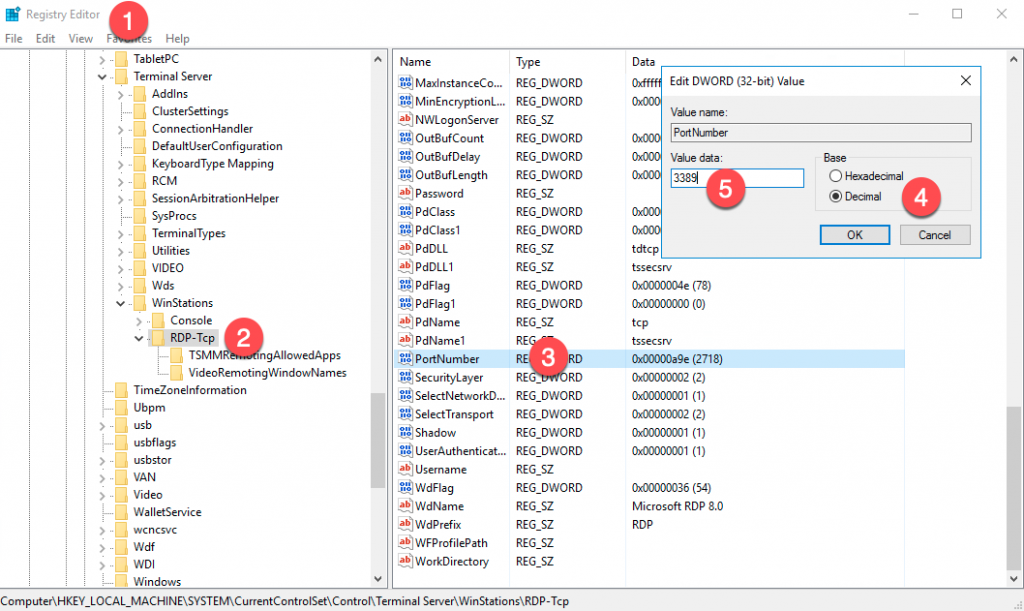
- Open registry editor app by searching for
regeditin windows search or useRUN. - Locate the following from
regeditapp:HKEY_LOCAL_MACHINE\System\CurrentControlSet\Control\Terminal Server\WinStations\RDP-Tcp - look for
PortNumberand right-click on it andModify - Make sure to select
DecimalunderBaseoption - Change the port number in the ‘value data’ area to any number you prefer, let’s say
1234and clickOK - Quit the registry editor
Step 3 – Restart the server to make the changes
- Double-check that you have entered the correct details for the firewall and that this matches the details in the registry.
- When you are sure you have completed all the above steps. Restart the server.
- Try to connect to RDP as usual but when you type the IP address, don’t forget to type the custom port number after the IP in this format
IP:Port(e.g. 192.168.1.5:1234) - You should now be able to connect through that specific port to your server.
- Bobs your uncle!